
The secret to making your pliers last longer and cut like new all the time is to keep them clean. However, because it is hard to not use pliers in dirty and greasy situations, you have to make it a habit to clean them regularly or at least after use. This will keep them clean and free of dirt and foreign materials that can cause deterioration and corrosion.
Also, the cleaning exercise allows you to have an up-close examination of your pliers to tell when it is time to replace them. In this article, I share useful cleaning and maintenance tips for pliers to keep them in good working condition all the time.
Table of Content
Why Should You Clean Pliers?
Like other tools and equipment, pliers collect grime and foreign material during use or storage. These materials can cause the pliers to corrode or become less effective. So, make it a habit to clean your pliers after use to keep dirt and grime from accumulating.
Another reason for keeping pliers clean is to extend their life. Dirt shortens the life of your tools. But if you routinely clean your pliers after every use you will make them last longer.
The third reason for keeping your pliers free of dirt and corrosion is to make them presentable. Dirty tools, not only pliers, appear messy even when they are properly organized. In other words, cleaning and organizing your tools go hand in hand.
The fourth reason for cleaning pliers is to restore them. This applies mostly to the old dirty pliers that require thorough cleaning and polishing to restore them.
If you collect antique hand tools, I know this is not news to you. Cleaning your collection of old rusty hand tools is the first step of the restoration process.
The process of cleaning your tools allows you to inspect them closely. This up-close examination of your tools makes it easy to tell which ones need servicing and which ones need to be replaced.
If you don’t take time to clean and inspect your pliers, you will never know when it is time to service or replace them. Consequently, they will always break down on you during work and it is frustrating and embarrassing.
Lastly, caring for your pliers is good because it is the right thing to do. In return, the pliers will appreciate your kindness by not letting you down when you need them the most.
Which Parts Of Pliers Should You Clean?
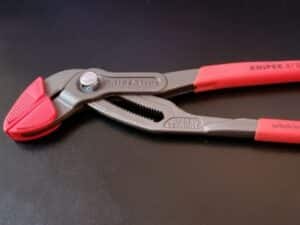
Pliers have three parts: the head, fulcrum or pivot, and handles. Each part requires special attention when cleaning.
For instance, the handles are affected mostly by grease and stains while the head and the joint are prone to rust and corrosion. A rusty joint or fulcrum makes it hard to open and close the jaws of pliers.
On the other hand, when crud accumulates in the grooves on the jaws it becomes hard to have a strong bite on an object. That is why you should pay close attention to each part when cleaning your pliers.
Also, different types of contaminants require different cleaning methods.
How To Clean Dirty Pliers
There are many ways to clean dirty pliers but my favorite and the easiest involves using dish soap and water.
How to clean pliers with dish soap and hot water

The best way to clean dirty pliers is to wash them with dish soap and hot water. It removes regular dirt and grease on the handles as well as the other parts of the pliers.
Tools and supplies
- Dish soap
- Hot water
- Bucket
- 2 towels
- Toothbrush
Instructions
- Pour hot water into the bucket.
- Add enough dish soap and stir to lather.
- Dip your dirty pliers into the cleaning solution and let sit for 5 minutes
- Scrub the pliers with a towel until they are clean. Pay special attention to the rubber handles as they tend to retain stains and grease.
- Use a toothbrush to remove dirt from the serrations on the jaws and the crevices around the joint.
- Rinse the tools in clean water to remove the soap.
- Wipe the tools thoroughly with another towel to dry them off. You can also expose them to a bit of heat to expel all the moisture from the joint. If you do not dry them well, the leftover moisture can lead to rust which causes your tools to deteriorate.
How To Remove Rust From Pliers (5 Methods)
Rust is a brown substance that forms when iron reacts with oxygen in the presence of water or moisture. It can cause the deterioration of pliers, leading to a shortened lifespan. Furthermore, if rust forms on the joint, it can make the pliers difficult to open with one hand.

Since most pliers are made of steel (an alloy of iron and carbon), they are prone to rust and corrosion. However, you can prevent it by keeping your pliers dry and applying a thin coat of machine oil. But if rusting has already taken place, there are several ways to clean the rust off but I will share the three most effective solutions.
Method 1: Removing rust with vinegar
Vinegar is a household commodity and this makes it the easiest method to remove rust from pliers and other tools.
Tools and supplies
- Distilled white vinegar
- Tumbler cup
- Old toothbrush
- Linseed oil or machine oil
Steps

- Pour distilled white vinegar into the cup. Pour enough to cover all the rusty parts of the pliers.
- Soak the rusty pliers in the cup full of vinegar and let it sit for 24 hours.
- After 24 hours, remove the pliers and scrub them with a toothbrush then rinse them off in the vinegar until all the rust is gone.
- While dipped in vinegar, open and close the jaws to expel all the gunk from the joint. Do this until the joint feels super smooth.
- Rinse off the pliers with water and dry them with a rag.
- Expose the cleaned pliers to heat to dry them completely. Heat is very important for drying parts like inside the joint where a rag cannot access.
- Apply a thin coat of rust protection oil to protect the pliers from rust. You can use machine oil or linseed oil.
- Apply a generous amount of the oil on the joint and open and close the jaws to allow the oil to penetrate. Then wipe off the excess.
Although vinegar is an effective solution for removing rust from tools, it has its own disadvantages. One, you need to give it a lot of time (like a day) to act on the rust. Second, vinegar can remove the paint on your tool since it is a weak acid anyway.
Method 2: Removing rust with WD40

WD40 is a penetrating oil that not only penetrates stuck parts but also protects metal from corrosion and rust and removes grime and grease. This rust remover offers a quicker way to remove surface rust from pliers especially when you are in the field or garage where you don’t have access to household items for removing rust.
Generally, WD40 acts on rust faster than vinegar. It also restores seized pliers and leaves a temporary protective coat on your tool.
Tools and supplies
- WD40 penetrating oil
- Cloth rug
Steps
- Spray WD-40 on the rusty or grimy pliers. Spray generously on the jaws and on the joint
- Open and close the handles to allow the rust removal oil to penetrate the joint.
- Now let the pliers stay for about 15 minutes to allow WD-40 to act on the rust.
- Use a rag or a light abrasive to wipe off the gunk from the pliers.
- Scrub the serrated jaws with an old toothbrush to remove all the grime.
- Open and close the jaws repeatedly and wipe off the gunk coming out of the joint.
- If there are still some rusty parts, spray more WD-40 oil on them and repeat the steps.
- Wipe the pliers clean with a piece of cloth and apply a light coat of machine oil to prevent corrosion in the future.
WD40 is a quick way to get rid of rust from your pliers and other tools after a busy day. It also serves as temporary rust protection which you peace of mind that your tools will not start to corrode immediately. WD-40 is a great way to care for your pliers when you are tired and don’t have a lot of time to clean the tools.
Method 3: Removing rust with lemon and salt
Lemon juice is another weak acid just like vinegar. It is also the cheapest of the three best ways to remove rust from tools. All you need is lemon, salt, a cup, and a scouring pad.
Steps
- Place the rusty pliers flat on a rug
- Cut the lemon in half
- Squeeze the juice out of the lemon into the cup. You can squeeze by hand or use a lemon squeezer. The choice is yours.
- Add a teaspoon of salt into the lemon juice and stir until all the salt dissolves. This might create a thick paste to mean that the solution is saturated.
- Apply some of the mixture to the rusty parts of the pliers and let sit for about 30 minutes.
- Keep adding more paste until during the 30 minutes wait time.
- After 30 minutes, use the scouring pad or rag to scrub off the rust. Work your way from the tip of the jaw down to where the handle covers start.
- Rinse off with water and pat dry with a microfiber cloth or kitchen towel
- Heat-dry to expel all the water at the joint. If you miss this step, your pliers will start to rust again at the joint. Rusty joints make it difficult to open and close the jaws of your pliers.
- Apply a coat of machine oil or linseed oil on the metallic surface of your pliers. Make sure to drench the joint with enough oil and wipe off the excess.
A mixture of lemon juice and salt is the cheapest way to remove surface rust on tools. Unfortunately, it is messier and not very effective for stubborn rust stains.
Method 4: Using Commercial Rust Remover Product
A better alternative to DIY rust removers is a commercial rust remover product. These are products made purposely to remove rust.
My all-time favorite is Evaporust but you need to give it enough time (more than 10 hours) to act on the rust. Krud Kutter is another one. It removes rust much faster than Evaporust but it is more expensive.
Check out how they compare in this video.
How to use Evaporust or Krud Kutter to remove rust off pliers
Tools:
- Cup
- Piece of cloth
- Old toothbrush
- Gloves
- Face shield
Step 1: Put on the safety gear. Wear rubber gloves first to protect your hands.
Step 2: Pour enough rust remover soak into a cup or bath
Step 3: Soak the rust pliers into the solution and let them sit for 10 hours (or 5 hours for Krud). Be sure to keep the jaws of the pliers open to increase the surface area of action.
Step 4: If you are using Evaporust, scrub the soaked pliers with the old toothbrush at halftime. Wear the face shield when scrubbing the pliers to protect your face from the rust remover droplets. Otherwise, scrubbing is not necessary when using Krud Kutter.
Step 5: Remove the pliers from the rust remover soak and wipe it dry with a cloth. Then inspect it to ensure all the rust has come off. If not, soak the pliers a little longer.
Step 6: If you are happy with the results, coat the metal part of the pliers with a thin layer of machine oil to keep it from rusting again.
Method 5: Brass Brush and Machine Oil

Another way to remove stubborn rust that won’t come off easily by cleaning is with a wire brush and machine oil. I prefer to use a brass brush because it has fairly soft bristles that scrub off rust without damaging the surface.
Applying a coat of machine oil on the rusty pliers ensures the rust comes off quickly. It also leaves a protective coat on the surface.
My favorite machine oil for removing rust in pliers is 3-in-1 multi-purpose oil. It removes rust and creates a thin coat to pliers from rusting again. Machine oil also works as a good lubricant for the pliers fulcrum.
If you don’t have machine oil, you can use WD-40. But unlike machine oil, regular WD-40 is not a lubricant. So, you should have both of them for tool maintenance.
These are the steps you follow to effectively remove rust from pliers using wire brush and 3in1 machine oil
Steps
- Apply a coat of 3in1 machine oil on the rusty parts of the pliers
- Let the pliers sit for 10 minutes so that the oil seeps into the rusty parts
- Scrub off the rust with a brass wire brush. Pay attention to the joints and jaws.
- Wipe off the dirt with a dry towel. You can apply a few drops of oil on the towel to wet it a little.
- Scrub until all the rust is off.
- Apply 2-3 drops of oil on the cleaned pliers and spread it on the metallic part of the pliers to form a thin protective coat.
How To Maintain Pliers
In summary, you can keep your trusty pliers in top condition by following these simple steps:
- Clean pliers after use with water and soap and wipe them dry. This will prevent moisture from building up and causing rust.
- Avoid leaving pliers outside at night. Always count your tools after a day of work to make sure they are all in the tool box.
- Wipe dry your pliers after use or after cleaning
- Apply a rust inhibitor on your pliers after cleaning them. You can use a rust inhibitor like WD-40 or machine oil to protect your pliers from rust. Simply spray a small amount on the pliers and wipe them down with a clean cloth.
- Apply machine oil to the pliers joint to reduce friction and prevent rust formation.
- Store pliers in a dry place. Use a desiccant such as silica gel to absorb moisture in the storage space.
- Avoid using pliers in an acidic environment as that will accelerate corrosion.
- Clean and service all your pliers at least once a month.
- Use rust-resistant pliers. These are pliers made from rust-resistant materials such as stainless steel or coated with a rust-resistant finish.