
If you’re tackling a wiring project and want to do it right, let me show you how you can crimp wire connectors like a pro. It might seem simple, but getting the perfect crimp ensures a solid and reliable connection. Trust me, the extra attention here goes a long way in avoiding loose connections or even dangerous malfunctions.
Tools You’ll Need
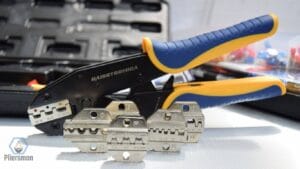
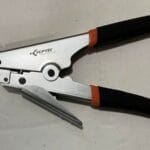
First things first: you need a crimping tool, a.k.a crimping pliers. These are specifically designed pliers for crimping connectors. They produce the best results. But if you don’t have one, you can make do with regular pliers — though the crimping won’t be as effective.

Most crimping pliers have separate sections for insulated and non-insulated terminals. The side for insulated terminals has round crimping slots, while the side for non-insulated terminals has a divot that pushes into the metal barrel of the connector.
You will also need crimp connectors.
Types of Crimp Connectors
You can use two basic types of crimp connectors to crimp wire: insulated and non-insulated. Each type offers a variety of terminal ends to choose from, covering you for pretty much any project.
Insulated Connectors

Insulated crimp connectors are the most common ones you’ll come across. They’re color-coded to make life easier:
- Red for wires sized 22–16 AWG
- Blue for wires sized 16–14 AWG
- Yellow for wires sized 14–10 AWG
Non-Insulated Connectors

Non-insulated crimp terminals are less common today. They aren’t color-coded, but you’ll notice the stamping of size on the metal plate.
Step-by-Step Crimping Process
Step 1. Prepare the Wire
The first step to a perfect crimp is to strip the wire properly. You’ll want to remove about a quarter inch of insulation from the wire.
Here’s how properly stripped wire looks like:
- No strands are nicked or damaged.
- The cut is clean and straight.
- The insulation is intact, with no scratches beyond the stripped area.
To achieve this, use the correct stripping slot on your tool. Remember, if pulling the insulation off isn’t smooth and easy, check your cutter size—it might be too small or too large.
Step 2: Insert the Wire into the Connector
Slide the stripped wire into the barrel of the connector. Make sure the wires are close together, so they don’t fray as you push them in.
Step 3: Check the Placement
Once you insert the wire, ensure it sticks out a tiny bit on the other side. Also, ensure the wire insulation is fully covered by the terminal’s insulation. If you strip the right size, you should not have a problem.
Step 4. Crimp the Wire
Position your crimping tool slightly behind the edge of the terminal barrel and press down firmly. For insulated terminals, use the side of your crimper marked for insulated connectors. A proper crimp will show:
- A visible wire end on one side.
- A bell-mouth shape at the terminal’s insulation.
Step 5. Perform a Tug Test
Give the crimped connection a gentle tug. It should hold firmly. If the wire insulation entered the barrel, your strip length might have been too long or the wire size mismatched.
Crimping Non-Insulated Connectors
The steps for crimping non-insulated connectors are mostly the same as for insulated terminals, but here’s the key difference:
- When crimping, use the side of the crimper for non-insulated terminals.
- Place the divot on the side opposite the gap in the terminal and Press down firmly.
If you mistakenly place the divot on the seam of the terminal, you’ll deform it instead of creating a proper crimp.
Pro Tips
- Always match the wire size to the connector size. This avoids loose connections or damage to the wire.
- Double-check the crimping tool labels to ensure you’re using the right section for your connector type.
- Take your time with the tug test—it’s better to catch a bad crimp now than after installation.
Conclusion
By following these steps, you’ll have a solid and reliable crimp every time. Trust me, once you get the hang of it, crimping connectors perfectly will become second nature. Whether you’re working on a DIY project or handling something more serious, mastering this skill will save you a lot of headaches down the road!