
When troubleshooting solar panel issues, I always start by inspecting the MC4 connectors. As a seasoned solar technician, I’ve replaced countless failed MC4 connectors, many of which appear burned. And in nearly every case, it comes down to one simple mistake: a bad crimp.
Sure, there are other culprits like connector mismatches, factory defects, incomplete insertion, or even harsh weather conditions (especially on rooftop installations). But a bad MC4 Connector crimp? That’s the number one reason most MC4 connectors fail.
Some folks swear by sticking to the original Staubli connectors to reduce MC4 connector issues. But while quality brands do matter, I hold the opinion that even a Staubli connector will fail if the crimp is bad.
That’s why in this guide, I walk you through exactly how I crimp MC4 connectors the right way for a safe and solid electrical connection.
Why Proper Crimping Matters
An MC4 connector is only as good as the connection inside it. A loose or under-crimped pin creates resistance, causes heat buildup, and can even become a fire hazard. Something as simple as a poor crimp can turn your entire solar panel investment into smoke.
So let’s get into the proper way to crimp MC4 solar connectors—from disassembly to the final click.
Step-by-Step: How To Crimp MC4 Connectors

Step 1: Disassemble the MC4 Connector
Start by unscrewing the end cap and sliding off the compression sleeve.
Before you do anything else, pass the wire through the end cap and sleeve. This step is easy to forget but absolutely necessary before crimping.
Step 2: Strip the Wire
Strip back about 1 inch (25 mm) of insulation from the end of the wire. Make sure you don’t nick or damage the strands.
Step 3: Insert the Wire into the Connector Pin
Grab the correct male or female connector pin depending on what side you’re working on. A female connector pin goes into the male MC4 connector while the male pin goes into the male connector housing.
Insert the bare conductor into the pin so that the wings rest on the wire strands, right where the insulation ends.
Step 4: Crimp the Connector Pin
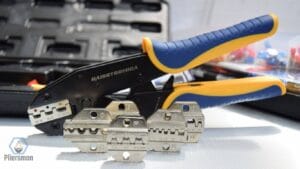
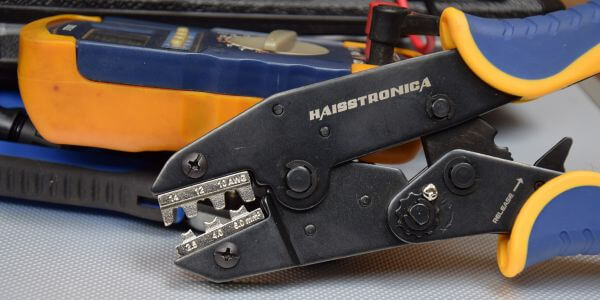
Place the connector pin with the wire inside your MC4 crimping tool. I’m using my favorite 6-in-1 haisstronica crimping set which comes with MC4 crimping dies.
Make sure the open wings are facing the side of the crimper with the “W” pattern.
Now squeeze the tool fully to make a tight, solid crimp. If your crimper doesn’t fully close the wings in one go, do a second crimp—but don’t overdo it.
Pro tip: Never use pliers or general-purpose crimpers. Use a proper MC4 crimping tool.
Step 5: Perform a Pull Test
Gently pull on the wire to check the crimp.
If the wire slips out or the pin feels loose, discard the pin and redo the crimp with a fresh one. You only get one shot per pin.
Step 6: Assemble the MC4 Connector
Once your crimp passes the pull test, insert the crimped pin into the MC4 housing until you hear a click.
Then, slide the compression sleeve back up and tighten the end cap firmly. Make sure the rubber gasket is properly seated to seal out moisture and dust.
Done! Repeat for the other connector
Congratulations—you’ve just crimped an MC4 connector like a pro.
Now repeat the process for the second connector (positive or negative) and double-check your work before plugging everything in.
Watch It in Action
Prefer watching? I’ve put together this quick video to show the entire MC4 crimping process step by step
Final Thoughts
Whether you’re a beginner or a seasoned installer, getting the crimp right can make or break your solar installation. A proper MC4 connector crimp does not just prevent callbacks but ensures electrical safety and optimal performance of your installation.