I have said time and again that multifunction pliers are great to have at home. You can use them to get around many home repair projects. The most versatile multifunction pliers are the channel lock pliers or tongue-and-groove pliers. I use them to fix minor plumbing issues at home and they help me to cut on plumbing costs. Some of the projects I have accomplished with the pliers include fixing a leaky faucet, uninstalling and installing a dishwasher, and even removing the P-trap on my bathroom sink to unclog it. In this article, I show you how to replace a wax ring on a toilet that’s leaking from underneath.
What is a wax ring seal or gasket?
A toilet wax ring is a wax seal between the toilet base and the flange. It keeps water from leaking as it flows from the toilet to the drainpipe down to the sewer. It also seals out sewer gases from getting back to your house.
Experts say that the toilet wax ring can last the life of the toilet but that is not the case always. Sometimes you will just notice the toilet leaking at the base, which indicates that the wax is not sealing properly. Another sign of a toilet wax ring failure is if the sewage gases come out of the toilet even with the bathroom drain hole closed. The only solution to those problems is to replace the toilet seal ring and this is how to do it.
Toilet wax ring replacement

What you need
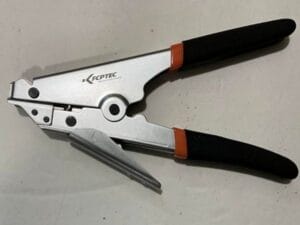
- Adjustable pliers or slip joint pliers
- New wax ring seal for toilet
- Trash can
- Scraper
- Rug
How to do it
Step 1. Turn off the water to your toilet tank
Find the shutoff valve and turn it off. Most plumbers position it on the side of the toilet tank or below it. If your toilet does not have one, just turn off the main water shutoff valve.
Step 2: Flush the toilet to drain all the water from the tank
Remove the tank cover and check if all the water in the tank has drained off. If not, use a sponge to suck it out and a can to squeeze the water from the sponge. Drain all the water from the toilet bowl as well. You can use a sponge to absorb the water. Draining all the water from the tank and bowl to make the toilet lighter for lifting.
Step 3: Disconnect the water supply line from the tank
Use the adjustable pliers to untighten the nut. Simply adjust the pliers to grip the nut and twist it open. Then untighten the nut by hand to disconnect the water line from the toilet tank.
Step 4: Uninstall the nuts at the base of the toilet
Adjust the channel lock pliers to grip the nuts holding down the toilet to break them loose. Then untighten by hand to remove the nuts.
Step 5: Remove both the tank and the toilet.
Grab the back of the toilet and lift up the entire toilet assembly and keep it aside. Don’t grab onto the tank because you might disconnect the washer holding the two together.
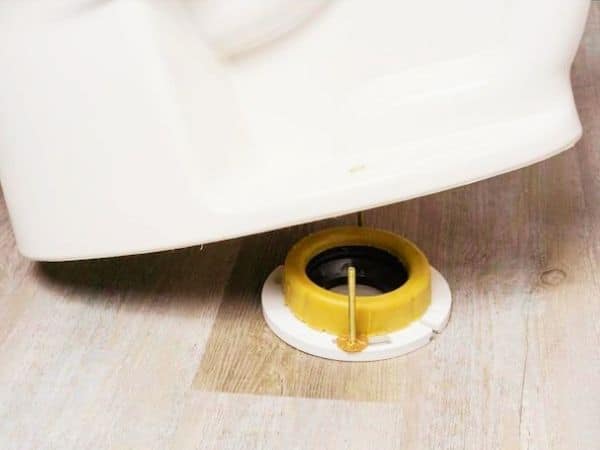
Step 6: Remove the old toilet wax ring seal

Wearing a pair of disposable latex gloves, pull the old wax ring seal from the flange by hand and put it in the trash can. Then pick the scraper and scrape off all the wax from the flange.
The flange is the plastic part that remains when you remove the toilet. It connects the toilet to the drain and has two bolts to which the toilet base attaches.
Lean the toilet over and scrape off any wax from the base.
Step 7: Install the new toilet wax ring or wax-free toilet bowl gasket
First, remove the plastic cover from the new toilet wax seal. Then lift the toilet on one side and lean it over install the wax ring seal. Install it with the “funnel” side facing down. The ring should stick onto the toilet firmly.
Alternatively, fit the wax ring onto the flange first and then place the toilet bowl on top. Use this method to install the wax-free toilet bowl gasket seal if that’s what you have.
Step 8: Reinstall the toilet onto the flange
After fitting the toilet seal ring onto the base of the toilet, not lift the toilet and place it on the flange. Ensure the plastic “funnel” of the wax ring aligns with the hole on the flange. The flange bolts should also align with the holes at the base of the toilet.
After sitting the toilet properly and firmly onto the flange, install the washers and nuts onto the stabilizer bolts. Start the nuts by hand and then snug them tight using the water pump pliers. Alternate from side to side while you lean over the toilet until the nuts are nice and tight.
Step 9: Connect the water supply line to the toilet tank
Use the multifunction pliers to tighten down the nut for the water supply line. Now place the cover of the toilet tank. Align it so that it sits properly.
Step 10: Lastly, turn on the water shutoff valve
Gently turn on the shutoff valve and test your fix. If water does not leak again, you have successfully fixed your leaking toilet wax seal. If the problem persists, seek help from a professional plumber.
Well, that’s one of the ways you can put your channel lock or water pump pliers to use whenever you notice your toilet is leaking from the bottom. You can use the above steps to replace a an old toilet.
Frequently Asked Questions
Because a professional plumber may charge you up to $200 to replace the wax ring while you could do it yourself and spend less than $20.
You know the toilet seal is leaking when you notice water flowing from underneath or bad gases escaping from the sewage to the house. Also, a failing wax ring seal may cause some play on the toilet.
The 10″ adjustable pliers are the most versatile for home repairs and plumbing.