
When the bathroom plumbing develops a problem, most people turn to the internet or ask around for affordable plumbers nearby. But plumbing is not cheap! It could cost you up to the tune of hundreds of dollars. But some of these bathroom plumbing issues are easy to fix by yourself. You only need the right tools and proper guidance.
In this article, I share with you how I remove and replace the Moen shower cartridge in my bathroom faucets. But first, what is a shower faucet cartridge?
A shower faucet cartridge is a type of valve inside single lever faucets that controls the flow and temperature of the water coming out of the faucet. The cartridge has holes that control the flow of cold and hot water when you turn the faucet handle. Compared with other types of faucet valves, shower cartridges mix hot and cold water more precisely.
However, over time, some parts of shower faucet cartridges clog or wear out necessitating servicing or replacement of the entire cartridge assembly. From experience and what the experts advise is that any of these signs could mean you have a bad cartridge bathroom faucet.
How to tell if your shower cartridge is bad
There are a couple of signs to look for to tell if your shower cartridge is bad and needs servicing or replacement. One of them is when the shower starts to drip or run even when you turn off the shower faucet. This could be
A second sign is if the shower handle gets more and more difficult to turn over time. Sometimes the handle may slip and not turn on the water at all.
A third sign that is very common is when the pressure of water from the faucet drops permanently. Another common sign of a failing shower cartridge is when hot and cold water doesn’t mix well anymore. You will notice this if you have to turn the shower handle all the way up to get the same level of hotness you got when the knob was halfway.
Another common sign of a failed shower cartridge is when the shower does not get hot at all. This is by far the most telling sign that you need to replace your shower cartridge assembly.
Shower Cartridge Replacement with Pliers

Shower faucets cartridges for various shower models are assembled differently. As such, you need to consult the instruction manual that comes with the replacement part. That being said, sometimes you just want to remove the old cartridge, clean it, and reinstall it. In such a situation, you may not have an instruction manual at hand or a special cartridge remover. That is why I put together this article to share how I remove and replace the cartridges in the shower with pliers.
How to Remove and Install a Moen Shower Cartridge with Pliers

Tools needed
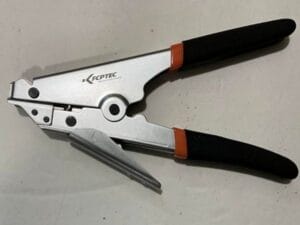
- Adjustable pliers
- Needle nose pliers
- Phillips screw driver
- Flat screwdriver
- 7/64″ Allen wrench or a set
- Replacement cartridge or rubber seals.
- Plumbing silicon grease
Step 1: Turn off the water supply to the bathroom
I prefer to turn off the main water supply to the house since most showers do not have individual supply valves. But if yours does, you can turn it off instead.
Step 2: Relieve pressure from the system
Turn on the bathroom faucet to relieve pressure and drain any water in the waterline. If you turned off the main supply valve, open the faucet that is closest to the main supply valve to relieve pressure from the system.
Step 3: Cover the shower drain or turb drain
Murphy’s Rule says that when working near an open drain, something will fall into it. So, close the tub stopper if you are working on the tub to avoid losing the screws down the drain. If the tub does not have a stopper, place a rug or a piece of cloth on the drain. Do the same for the bathroom drain hole.
Step 4: Remove the handle
The Moen handles have a set screw on the side for attaching the handle to the handle adapter. Turn the handle to locate the screw and then use an Allen wrench to remove the screw.
Step 5: Remove the handle adapter
Loosen the handle adapter center screw with the Phillips screwdriver and remove the handle adapter. The handle adapter is where the handle attaches to. It also keeps the key stop and the adjustable temperature limit stop in place.
Step 5: Take off the key stop and adjustable temperature limit stop
The key stop and adjustable temperature limit stop is the plastic piece revealed after removing the handle adapter. Take them off then pull out the chrome sleeve around the mixer valve.
Step 6: Remove the cartridge retaining clip with needle nose pliers
Use your needle nose pliers to pull out the cartridge retaining clip. Simply open the pliers, hook one jaw through the clip, close the jaws to bite the clip, and then and pull the clip upward. The clip will come right off.
Step 7: Remove the shower cartridge from the valve using adjustable pliers
Adjustable pliers (whether slip joint or water pump pliers) provide good leverage and gripping strength. Use either of them to pull out the cartridge from the shower valve. Follow these steps:
- Adjust the jaws of the adjustable pliers to grip the flat sides of the stem tightly.
- Turn the stem over so that the notch faces up.
- Grip the stem tightly and pull to remove the cartridge.
If the cartridge is too tight, try to wiggle it right and left as you pull. Sometimes the rubber seals get stuck in the water outlet making it extremely difficult to take out the cartridge.
But a good bite with the pliers, some muscle, and a little bit of wiggling should do the trick. You do not need the Moen cartridge removal tool.
Step 8: Install the new shower faucet cartridge
First, dab a little bit of grease on the cartridge oval on both sides. Spread it well around the edges with your finger. Do the same on the o-ring.
Now grip the stem of the new cartridge with the adjustable pliers. Ensure the HC symbol on the front of the cartridge and the notch on the stem are facing up before inserting the unit into the faucet valve. Make sure it sits in properly.
Step 9: Insert the cartridge retaining clip
Grab the retaining clip with needle nose pliers and reinstall it to hold the cartridge in place. Make sure the clip sits in properly just like you found it.
10: Turn the cartridge to the off position
Before installing the other accessories and faucet trim pieces, turn the cartridge to the off position. Use the adjustable pliers to grip and turn the stem counterclockwise so that the notch on the stem faces down.
11. Re-install other faucet trim pieces.
Start by sliding the stop sleeve or tube onto the cartridge housing, followed by the adjustable temperature limit stop, and finally the handle adapter.
However, be sure to turn the handle adapter 180 degrees so that the side screw hole onto which the handle’s set screw attaches is facing down. This will ensure that the OFF position will have a positive stop because OFF is straight down.
12. Reinstall the handle
Turn the handle 180 degrees to line the set screw hole with the hole on the handle adapter. Install the set screw and tighten it snug with the 7/64 Allen key.
Replace the set screw cap if there was one.
13. Test the new cartridge installation.
First, clean up your workspace and pick up your tools and suppliers from the tub or bathroom floor. Uncover the drains, turn off the faucets, and then turn on the water at the supply source.
Now test the shower faucet to ensure water comes out and is hot or cold as it should. But if you notice that the hot and cold are reversed, just undo the handle assembly and flip the core 180 degrees. That should fix the problem.
Well, that is how to change a cartridge on Moen tub or shower faucets. If Although the method works with most Moen cartridges, I recommend you consult the manual for the specific part number of your cartridge. There could be a slight difference in how they are assembled.
Resources
Moen Website: https://solutions.moen.com/Article_Library/How_to_Adjust_the_PosiTemp_Temperature_Limit_Stop