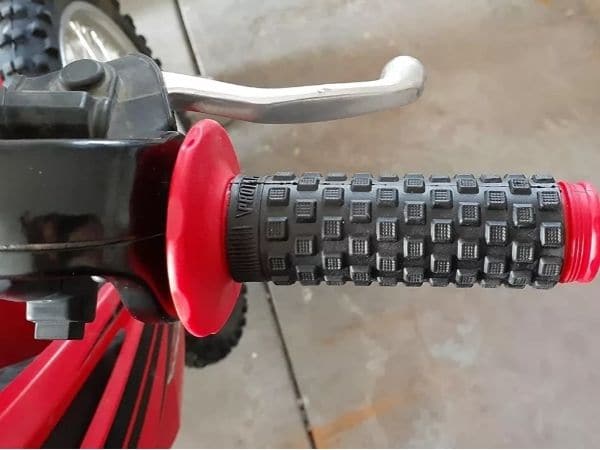
The handlebar grips of motorcycles or bikes wear out over time and can come loose or slide off. When the grip on the throttle bar starts to slip or move, it can affect your acceleration. This can be dangerous on the racing track or when riding at high speed in the streets. Worn-out handle bar grips are also uncomfortable for your hands, but that is not critical.
Do handle bar grips loosen on all bikes?
It does not matter if you ride a dirt bike or a street bike. The handle grips slippage is a universal problem that happens to all bikes including quad bikes. The best way to keep the problem from happening is to reinforce the grips on the handles.
Some people secure the bike grips using adhesives such as handlebar grip glue, 3M strip, or regular super glue. Others use unconventional methods such as applying spray paint on the handlebars and inside the grips before installing them. Others just put a zip tie over the grips. All these methods help to keep the grips from slipping or coming off but each has a downside.
Adhesives can lose their strength over time, especially when they get in contact with contaminants and dirt. This happens mostly with dirt bike grips when the bikes crash into dirt and mud. Other grip glues can stick so strong that it becomes difficult to remove the grips cleanly when changing them out.
Similarly, spray paint may wear out over time and cause the grips to start moving. Some paints can even cause the inside of the rubber grips to harden and become less elastic. Zip ties, on the other hand, are too thick and may come in the way of operating the bike effectively.
What secures motorcycle handlebar grips the best is safety wire. In fact, some motorcycle grips come with radial grooves specially made for lockwire.

Why is safety wire the best for securing bike grips?
There are many reasons to choose safety wire to secure bike grips over other methods. The first one is neatness. Safety wire wraps around the grips neatly and won’t come in your way as zip ties do. If you twist the wire correctly, cut it at the right place, and bend the end properly, you will not have to worry about it injuring you or catching your riding gloves.
The second reason for choosing safety wire is that they secure the grips strongly and tightly. Nothing grips as tight as safety wire. A fairly thin safety wire exerts enough pressure on the grips to keep them from slipping or moving. When you install a sufficient number of safety wire wraps, you can be sure that the grips won’t go anywhere even if you get hard on them or crash. In fact, safety wired rubber bike grips are more likely to tear than slip off when you twist them hard.
The third reason why safety wire is the best is that it is professionally accepted for fastening. Besides tying torqued bolts together, you can also use it to make DIY clamps for fastening hoses and bike grips.
The fourth reason is that safety wire can withstand harsh conditions and won’t degrade or rust over time. Therefore, your sweaty hands, dirt, or harsh weather conditions won’t affect the integrity of a tie wire grip. These stainless steel wires are designed to withstand harsh conditions. They won’t rust, break, become loose, or unravel. That is why they are used to secure bolts and other parts in an aircraft.
Lastly, it is easy to install safety lock wire. All you need is a proper tool, preferably a wire twisting tool. I suggest getting a pair if you are an avid biker because you will be needing them often. But if a decent pair of lockwire pliers is out of reach, you can get yourself some duckbill pliers and use them to twist safety wire manually. Duckbills do a good job of twisting lockwire but not better than lock wire pliers.
How to safety wire bike handlebars grips

Wire tying the handgrips of a motorcycle is easy so long as you have the right tools and equipment. In this section, I take you through all the steps for clamping the grips with lock wire. You will need the following tools and supplies to complete the exercise.
Tools and supplies
- Lock wire/safety wire (0.02″ or 0.032″)
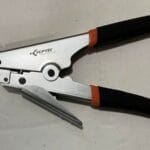
- Safety wire pliers
- Diagonal cutters
- Ball pein hammer
Steps
Step 1: Cut enough length of safety wire
Use a pair of wire cutter pliers to cut enough length of lock wire that will go around the handle grip twice and leave some length. About 20 inches of wire should be long enough for any type of bike grip.
If you are wondering what size of safety wire is best for securing the grips, 0.02″ or 0.032″ will do the job. If it is thicker, it may be difficult to manage and if it is thinner it may cut into the grips.
Step 2: Wrap the safety wire around the grip
Loop the safety wire twice on the grip near the edge of the collar. Then line the two strands to make a single ring and bite and lock the ends of the wire with your safety wire pliers. The reason for looping the safety wire twice is to make double strands that are more sturdy and won’t break easily like single strands. Also, dual strands tighten better.
If you are wondering how to get a good pair of safety wire pliers, check out this article on some of the best safety wire pliers for various tasks including DIY craft.
Step 3: Stretch and squeeze the grips inwards to expell the air.
Before you start twisting the lock wire, stretch the handle grip inward by hand and squeeze it radially to expel trapped air. This ensures that your grips will not have blisters when you lock wire them.
Step 4: Twist the safety wire onto the grip with wire twisting pliers
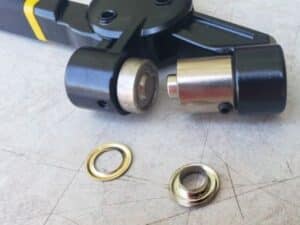
With the lockwire pliers locked onto the ends of the safety wire, snap them twice to stretch the wire. Then start twisting the pliers by pulling the knob. The pull knob operates the twisting mechanism of the safety wire pliers. Keep pulling and releasing the knob to twist the wires together until a very small gap is left between the last twist and the handle bar grip.
Now unlock the pliers and grip close to the top of the twisted wire. Hand twist the wire to a tight grip. The reason for not twisting the wire automatically all the way is to avoid putting so much tension that would cause it to break. Finishing the twist by hand helps take away the slack in the wire without putting so much tension on the wire.
Step 5: Snip off the twisted wire and bend it
Clip off the twisted wire at about 10 twists from the grip or 1 inch. Then bend the tip of the twisted wire end at about 3/8″ from the end and tuck it into the grip. Use the ball pein hammer to smash the end of the wire into the grip. This method works best for pillow type handlebar grips.
If you working with waffle handle bar grips that have lock wire grooves, just snip off the twisted wire at about 1/4″ from the top and bend the tip back into the groove to keep it from catching your gloves or skin.
Step 6: Install two more rings of lock wire to the grip.
Repeat steps 1-5 to install another dual strand of lock wire at the center of the grip and at the end. Also, repeat the whole process for the other handle bar grip.