Pliers have two main failure points; the jaws and the handle grips. The jaws fail by breaking, losing grip, or the cutters becoming blunt. On the other hand, plier handle grips fail by wearing out, slipping, hardening, or cracking.
As the handle grips of pliers deteriorate, they become less ergonomic to grip and uncomfortable to hold. They can cause blisters on your palm.
And when used for a prolonged period, pliers with worn out handle grips can cause severe conditions such as Carpal Tunnel syndrome.
Whilst you can restore dull cutting edges of pliers by sharpening or improve gripping jaws by filing the teeth, you cannot restore damaged plier handle covers. You can only change them.
So, how do you replace handle grips on pliers?
In this article, I share two effective ways to deal with worn out plier handles. But first, let us look at some of the reasons why you may need to fix plier handles.
Table of Content
Why Should You Replace Plier Handles?
There are many reasons why you may want to replace pliers handle grips but these are the major ones.
1. Plier handle sleeves undergo normal wear and tear
After using your pliers for a long time, the handle grips will wear out gradually and become less comfortable. This is the most obvious reason why you may want to replace the handle covers.
How do you tell the grips are worn out? You know that the handle covers of your pliers are worn out when you notice the pliers are starting to slip off of your hand. Another way to tell that the pliers handle covers are worn out and that you should replace them is when you find out that the patterns and texture on the handles have smoothened out completely.
2. Plier handle grips harden and crack
Sometimes the handle covers of pliers harden and eventually start to crack or chip away. This happens mostly when you expose the soft rubber handles to oils and other contaminants that harden rubber.
When the rubber handles of pliers harden, they stop being comfortable in the hands. In fact, hardened handle grips feel like bare metal handles in the hands and can cause blistering.
3. Handle grips keep sliding off
Some plier handle grips keep sliding off. This can be annoying when it happens in the middle of a project because you have to constantly stop and put them back.
You can apply super glue to the pliers grips that keep sliding off or replace them permanently with better and more reliable grips.
Alternatively, you use spray paint to secure loose pliers grips. Just spray-paint the inside of the grips before pushing them back on the handles. They will stick on the handles permanently until they were out.
4. To restore an old pair of pliers
When bringing an old rusty pair of pliers back to life, you can put in new handle grips after cleaning the pliers thoroughly.
5. To give your favorite pliers a new look
Sometimes you may just want to replace the handles of your trusty pliers to give them a new look. The grips do not have to be worn out or broken. You can replace the handles because you desire a different feel or want to see them in a different color.
Now that you know the various reasons why you might want to replace plier handles, how do you go about it?
How To Replace Pliers Grips
There are two main ways to replace old or worn pliers handle grips. You can either replace them with new ones or plastic dip the handles yourself.
A) Install new handle grips for pliers
Installing new handles on pliers is the easiest method to restore a comfortable grip on your trusty pair of pliers. You just remove the old ones and attach new handles.
My favorite plier replacement grips are the standard Klein plastic replacement handles. They are easy to install and stay on the handles for a long time if you install them properly.
Pliers replacement handles come in different materials. The common ones are rubber and plastic.
Rubber plier handles are soft and comfortable while plastic handles are harder but more durable.
Despite their differences, both types of plier handle covers provide a slip-resistant grip and some level of comfort in the hand.
How to install Klein plastic replacement handles for pliers

Tools you need:
- Klein replacement grips
- Hot water
- Jug
- Tongs
- Rag
Steps
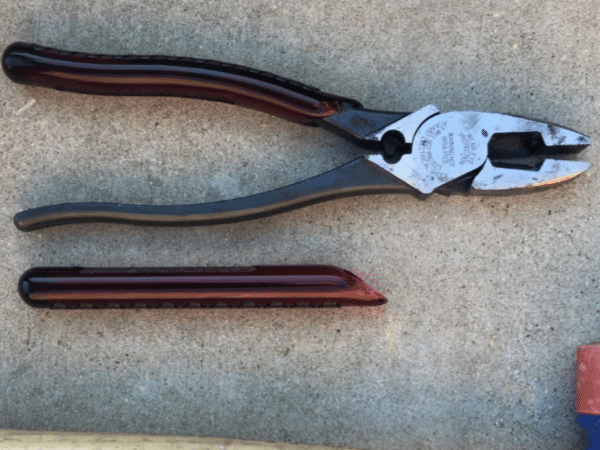
1. Remove the old handle covers.
Use a utility knife to make a cut into the old handle covers before peeling them off from the handles. They should come straight off.
Jump to the next step if the plier handles do not have covers.
2. Clean the handles of the pliers.
Use dish soap and a piece of rag to clean the handles. If the handles are rusty, try any of these methods of cleaning rusty pliers.
3. Prepare the new Klein plastic slip on replacement grips for installation.
Start by boiling water and transfer it to a jug or can. Then dip the new plastic handles into the hot water and let them sit for 60 seconds before removing them. Do not let the replacement grips sit in hot water for long or they will warp.
Use a pair of tongs to remove the handle grips from hot water and hold them with a rag to avoid burning your fingers.
4. Install the new Klein grips onto the the handles.
While the slip-on grips are still hot, slide them onto the handles one at a time. Pull each grip all the way to cover the entire handle length.
If they are hard to pull, dip the handles into the hot water for about 30 seconds to soften the grips so that you can pull them easily.
5. Congratulations! You have successfully replaced old pliers grips with new plastic grips from Klein.
Unfortunately, the Klein plastic grips are not one-size-fits-all. They only work with 8″ or 9″ regular pliers. So, if your pliers are of a different size, you might want to find alternative replacement slip-on handle grips.
But if you do not want to buy slip-on plier handles, you can mold new handles onto your pliers using liquid plastic coating.
B)Plastic dip plier handles
What is plastic dipping?
Plastic dipping is the process of applying a plastic mold over a surface. It is a common practice for repairing worn tool handles.
Plastic dipping has also become very popular in the automotive industry for coating cars. However, the plastic dip used on cars is not the same as the one used on tools. Cars use aerosol plastic coating while tools use liquid plastic coating.
Which is the best plastic dip coating for tools?
While there are many brands of liquid plastic dip coating but plasti dip is the most popular. It is also the most effective plastic dip coating for tools that I know. It sticks very well on steel and provides a non-slip grip especially if you apply a couple of layers and follow the instructions.
Plasti dip can hold up for as long as 5 years if you do it properly. Here’s how to do it.
How to plastic dip plier handles with Plasti Dip

Tools and supplies needed:
- Plasti Dip can (not aerosol)
- Rag
- Dish soap and water
- Knife
Steps
1. Remove worn plier handle covers
Pull the damaged grips from pliers by hand. If the grips are hard to come off, use a knife to cut and scrape them off.
2. Clean the plier handles
Use dish soap and a rag to clean the handles. If pieces of old grips are still stuck on the handles, use steel wool or wire brush to scrub them off. Just make the handles are clean and free of any dirt or rust.
Also, wipe dry the handles before proceeding to the next step.

3. Open the plasti dip can and stir the liquid to mix it up
The right PlastiDip coat for tool handles is the liquid, not the aerosol spray. So, first, make sure you have the right product. Now open the PlastiDip can and use a clean stick, wire, or plastic to gently stir the liquid to mix it up. Don’t stir the liquid vigorously or shake the can as it will cause bubbles to form that will affect the quality of the final product.
4. Gently dip the plier handles into the PlastiDip liquid
Drop the plier handles into the liquid plastic one inch at a time and wait for 5 seconds. This will ensure you get a good coat on the handles and also eliminate air bubbles. Air bubbles in the plasti dip coating can cause the handle covers to fail prematurely.
5. Gently draw the plier handles from the PlastiDip liquid and let dry for 30 minutes.
Once you draw the plier handles from the PlastiDip can, hang the pliers vertically with a wire for 30 minutes to allow the plasidip coat to cure. Close the lid of the plasti dip can as you wait for the plastidip layer on the plier handles to cure.
6. Repeat steps 3 to 5 twice to create a thick plasti dip coating
Because a single coat is not thick enough, repeat steps 3 to 5 two times to creat three layers of plastidip coat. But if you need the handles to be thicker, repeat the steps as many times until you get your desired thickness.
Remember to allow the pliers to sit for 30 minutes after each coat.
7. Cut off the tails and sand down the handle ends
You will notice that tails form on the handle ends as excess plasti dip liquid drips off during the curing process. To deal with these tails, just cut them off with a knife and sand down the handle tips to create a nice smooth finish.

Wrap up
Now you know how to restore plier handle grips that are broken, cracked, or worn out. You can either replace the handle covers with new slip-on grips or create a thick mold on the handles using Plasti Dip coating liquid.
So, next time don’t be quick to throw away your trusty vintage pliers because they have bad grips or no grips at all. Just plasti dip the handles to create new rubber covers. But if you do not have the time to mold the grips yourself, just get new slip-on plier handle sleeves and bring your pliers back to life again!