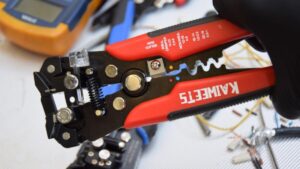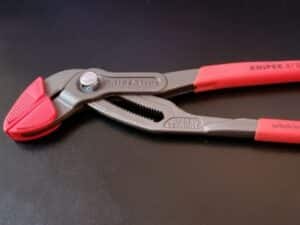

Tin snips or metal shears are a type of cutting pliers for sheet metal. You can also use them to cut other materials such cardboard, plastic sheeting, PVC, chicken wire, and floorings like carpet and vinyl.
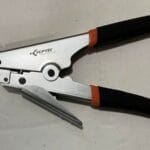
There are two major types of tin snips; standard tin snips and compound snips (also known as aviation snips).
The standard snips look exactly like heavy-duty scissors and have one pivot point. In contrast, the aviation snips have a more complex design that incorporates two pivot points to provide more leverage than the regular snips. They also come in different varieties including straight, left, and right.
Table of Content
Primarily, the aviation snips were meant for use in the airplane manufacturing industry but people use them in other trades such as HVAC and roofing to cut metal sheets.
As with other cutting tools, sheet metal snips get blunt after repeated use and require sharpening to continue cutting effectively. But sharpening the metal shears is not simply taking a file and filing the edges. No! There is a technique for doing it lest you ruin your tool.
In this article, I share different methods of sharpening tin snips to restore them to cutting effectively again. But first, let us look at the signs of a dull pair of metal snips.
How to tell that your tin snips are blunt

There are many ways to tell that your tin snip pliers are blunt and cannot cut well but these are the most common signs to look for:
- They leave rough edges on the workpiece
- It takes more effort to cut through material with the metal snips
- The shears first bend the sheet metal at the cutting line before actually cutting through
- Your hand feels strained and fatigued after cutting just a few sheets of metal.
- The tin snips don’t cut heavier gauge metal sheets as rated
- The tin cutters struggle to cut thin sheet materials
How to sharpen tin snips in three ways
There is more than one way to sharpen a blunt snip cutter. The method you choose depends either on the availability of the resources needed, the type of snips you have, the complexity of the method, and personal preference. In this section, I share 4 alternative ways to sharpen your snip pliers.
Before you attempt to sharpen the shears, clean them first and get rid of any surface rust. Find out more about how to effectively clean pliers and get rid of rust in this article.
Method 1: Sharpening tin snips with a hand file
Tools needed:
- Metal cutting shears to be sharpened
- Hand file
- Bench vise
Instructions
- Open the shears fully. If you are using the compound action snips, you will have to remove the pivot bolt next to the cutting edge to allow the cutters to open fully.
- Secure the open shears upright on the bench vise. Grip them by the handles so that the cutters face up.
- Place the sharpening file flat on the beveled edge of one of the cutters close to the pivot.
- Apply a little pressure on the file and drag it along the length of the cutting edge from the pivot point to the tip and going inwards.
Make 5 to 10 passes. - Turn the tin snips around and repeat steps 2 – 4. Don’t close the cutters yet.
- Remove the sharpened shears from the bench while keeping them open.
- Close the handles while slightly pushing the faces of the blades away from each other.
- Lastly, press the closed cutters together and attempt to open the shears at the same time. This will remove any burrs created when sharpening the tool.
- Alternatively, you can use a wet whetstone to stroke the sharpened edge lightly in order to remove burrs that otherwise could ruin the newly sharpened edge.
- Apply machine oil to the tool to prevent rust.
Method 2: Sharpening tin snips with a grinder or dremel
The process of sharpening your metal shears with a grinder or Dremel is the same as using a hand file. The only difference is that you use a power tool instead of a hand tool. That makes the process easier but costlier because power tools are more expensive than hand tools.
That being said, a grinder or dremel does a better job than a hand file. You only need to do it right because you can also ruin your shears easily if you mess.
These are the tools you will need:
- Dremel or grinder
- Metal shears
- Bench vise
- Whetstone
Instructions
Before you start, ensure the tool is clean and free of rust.
- Open the shears all the way and secure them on the vise with the blades facing up. The bevel of one of the blades and the face of the other will face you.
- Install the right grinding disk on your dremel or grinder.
- Turn ON the grinder or Dremel and make two passes at an angle on the beveled edge of one of the blades from the pivot to the tip.
- Release the snips from the vise, turn them over and clamp them down. Now the beveled edge of the other blade is facing you.
- Again, make two passes on the bevel of that blade with the grinder or dremel from the pivot to the tip.
6. Lastly, polish the blades on a smooth 3000 grit whetstone. This will hone the edges and remove any burrs so that you have a consistently sharp cutting edge.
Method 3. Sharpening tin snips with a whetstone
A whetstone (also known as a sharpening stone)is the most traditional tool for sharpening. Accordingly, it is the slowest but one of the most effective DIY methods of sharpening tin snips and knives.
When sharpening a very blunt blade or cutter, use dual grit sharpening stone. This is a whetstone with two different grits, preferably a medium grit and fine grit. Start sharpening with the coarse or medium grit side because it is abrasive and then finish with the fine grit to hone the edge.
My favorite dual grit whetstone for sharpening tin snips and other cutters is the KeenBest Sharpening Stone. It includes two dual grit blocks of 400/1000 grit and 3000/8000 grit that stack together on an angled wooden base. I have shared a link to it on Amazon below.
To sharpen your tin snips, you need the following tools and supplies:
- Whetstone
- Blunt tinsnips
- Cup of water
- Rag
Instructions
1. Clean the shears
Clean the metal shears off any dust and dirt. Also, remove any rust on the blade. Cleaning should be the first step whenever you want to sharpen any type of cutter.
2. Disassemble the cutters
Unscrew the pivot screw on the regular snips to separate the two cutters. If you are dealing with compound snips, remove the first pivot screw and other screws on the side.
3. Sharpen each blade at a time
Grab one of the cutters and turn it over so that the beveled edge faces downward. Slide the blade against the medium grit whetstone (between 1000 to 3000 grit) while applying pressure onto the blade.
Work from the back of the edge to the tip to cover the whole blade in one stroke. Keep the blade angled so that the bevel gets good contact with the sharpening stone. You can apply a few drops of water to the sharpening stone as honing oil
Do a couple of passes (roughly 20 to 30) and check after every few strokes to see that the bevel has the same shine from the back to the tip. Repeat the steps on the second cutter.
4. Polish the blades
If you look closely at the sharpened blades, you will notice burrs on the cutting edge and roughness on the bevel. That is why you need to pass the blades on the fine-grit whetstone (at least 4000 grit) to polish the rough bevel and refine the edge by removing burrs.
Pick one blade at a time and pass it on the fine grit stone a few strokes until they are smooth and sharp. Work from end to end. Be sure to wet the stone with water to ensure smooth honing of the blade.
5. Wipe the blades to remove swarf
After sharpening the blades, wipe them with a wet rag to remove metal filings and dust (swarf). Dab a little oil on the blades as well to keep them from rusting and to minimize friction.
6. Re-Assemble the cutters
Put the cutters back together and test the newly sharpened tin snips to see if they cut better. If they don’t, resharpen again.
Conclusion
In summary, these are the three easy ways to sharpen blunt tin snips. You can use a hand file, whetstone, or a rotary tool such as a Dremel. If none of them works, consider replacing the tool. And remember, keeping your snips clean and cutting with them what they are rated to cut will keep them sharp longer.